

Led dimmer in cabine.
Mar 27, 2012 8:44:23 GMT
Post by sailbleu on Mar 27, 2012 8:44:23 GMT
Some time ago , about 2 year to be exact (my god how time flies) I've installed leds in de cabine.
I was looking for a decent replacement when Gene replaced his on the Santosha and the pics he presented convinced me this was the real deal.
jeanneau.proboards.com/index.cgi?action=display&board=eq&thread=1217&page=1
I immediatly ordered a batch (several at the end) for my own at the same ebay seller in China.
www.ebay.com/sch/whats_up_sun/m.html?_trkparms=65%253A12%257C66%253A4%257C39%253A1%257C72%253A5317&rt=nc&_ipg=200&_trksid=p3911.c0.m14.l1581&_pgn=5
Really great , and ever so current-economical.
I dont regret that decision for an instant , in the meantime I've bought more replacements (different ones) to be converted for the navigation lights . But that's a another story.
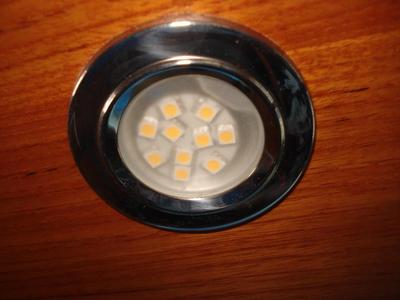
So all my cabin ,bath- and bedroom lights are now leds.
Same color and same intensity as the halogen lights , and so far not one bulb has let me down.
I was however wrestling with the idea on making the leds dimmable.
Makes it all a bit cosier in the evening doesn't it .
But there is a small problem in using led dimmers , you need to interrupt the plus and the negativ.
In some cases that means rewiring the whole sytems which is not always easy.
A few months ago I've installed a galley grabpole (see hints and tips) and while doing that some of the wiring was made clear to me . Infact , making the cabin light dimmable would turn out to be a piece of cake.
All I needed was the (cheap) dimmer and I found that (again ,where else ) with a Chinese ebay seller.
www.ebay.com/sch/m.html?_nkw=dimmer&_sacat=0&_odkw=&item=220981260443&_osacat=0&_ssn=nonstopwin
Also bought some other stuff , more to come in hint and tips section.
Anyway , this is the dimmer , of course I have a spare , you never know.
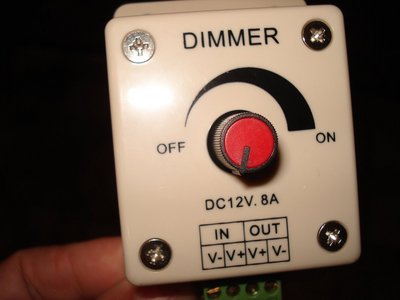
This is the one. It is a build-up box though , and I wanted to integrated into the ceiling on the spot where the old switch is/was located.
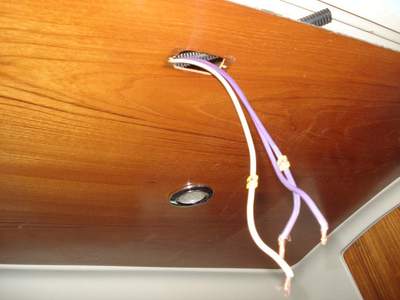
Getting the original switch out was the first job.
Figuring out the wiring. Blue (the fat one ) is negativ that had to be cut.
The white is the main positive but I could use (disconnect) the one on the original switch .
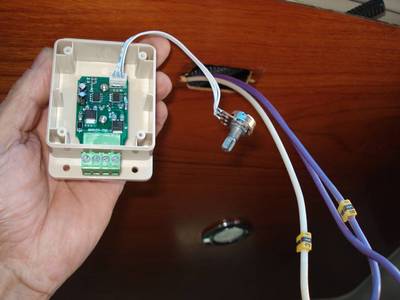
Breaking up the box with print from the lit was the trick.
The box would disappear behind the wooden ceiling , the cover and the potentiometer would be mounted to the ceiling.
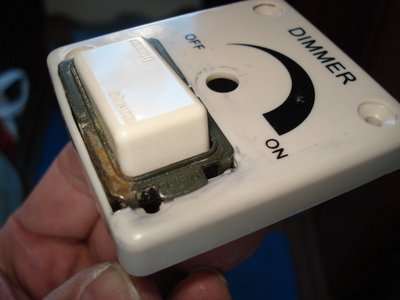
Building the old (and still necessairy switch) into the cover , leaving some space for the potentiometer.
In a later stage I will also make a cover to hide the switch edges , make a bit facier so to speek.
Look at that , it kinda fits.
And my main objectiv is reached , not making the switchhole bigger than it was.
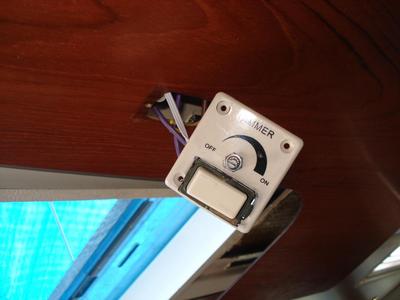
Front view.
Some TEC-7 to be sure.
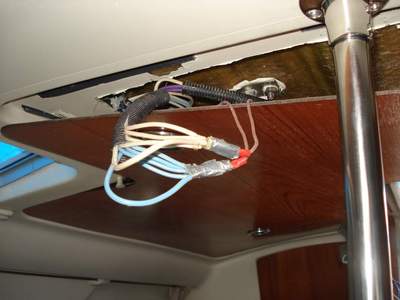
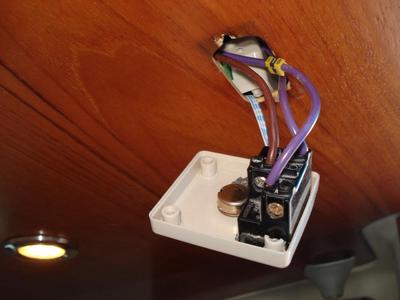
Interrupting the main negativ.
The reshaped cover is slightly glued to the ceiling , I didn't want to use screws because you never know if it's to be removed in the future.
I'm always very much aware for not drilling or screwing exessive holes in the interior , they're never to be made invissible afterwards when you dont need them anymore.
Here's the dimmer at full trottle.
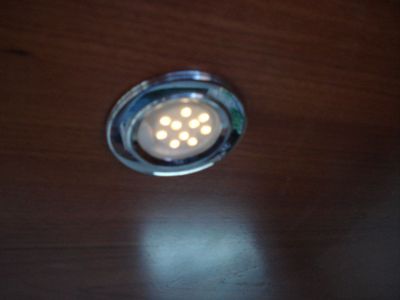
This mode is for evening pleasures
Nice dont you think.
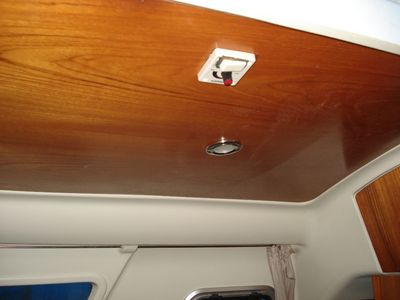
As an addition , while the wooden ceiling was out , I've placed and extra light just above the big fridge , we missed that in the past.
In the end all of this wasn't too much of a hassle.
A days work , a few bucks for a classy upgrade in my opinion.
I was looking for a decent replacement when Gene replaced his on the Santosha and the pics he presented convinced me this was the real deal.
jeanneau.proboards.com/index.cgi?action=display&board=eq&thread=1217&page=1
I immediatly ordered a batch (several at the end) for my own at the same ebay seller in China.
www.ebay.com/sch/whats_up_sun/m.html?_trkparms=65%253A12%257C66%253A4%257C39%253A1%257C72%253A5317&rt=nc&_ipg=200&_trksid=p3911.c0.m14.l1581&_pgn=5
Really great , and ever so current-economical.
I dont regret that decision for an instant , in the meantime I've bought more replacements (different ones) to be converted for the navigation lights . But that's a another story.
So all my cabin ,bath- and bedroom lights are now leds.
Same color and same intensity as the halogen lights , and so far not one bulb has let me down.
I was however wrestling with the idea on making the leds dimmable.
Makes it all a bit cosier in the evening doesn't it .
But there is a small problem in using led dimmers , you need to interrupt the plus and the negativ.
In some cases that means rewiring the whole sytems which is not always easy.
A few months ago I've installed a galley grabpole (see hints and tips) and while doing that some of the wiring was made clear to me . Infact , making the cabin light dimmable would turn out to be a piece of cake.
All I needed was the (cheap) dimmer and I found that (again ,where else
 ) with a Chinese ebay seller.
www.ebay.com/sch/m.html?_nkw=dimmer&_sacat=0&_odkw=&item=220981260443&_osacat=0&_ssn=nonstopwin
Also bought some other stuff , more to come in hint and tips section.
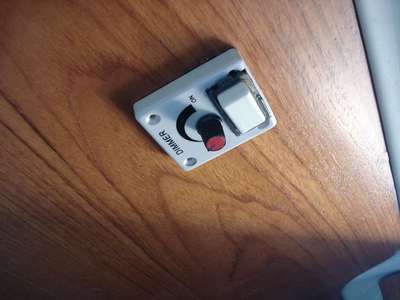
Anyway , this is the dimmer , of course I have a spare , you never know.
This is the one. It is a build-up box though , and I wanted to integrated into the ceiling on the spot where the old switch is/was located.
Getting the original switch out was the first job.
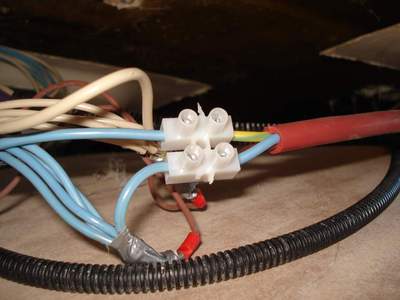
Figuring out the wiring. Blue (the fat one ) is negativ that had to be cut.
The white is the main positive but I could use (disconnect) the one on the original switch .
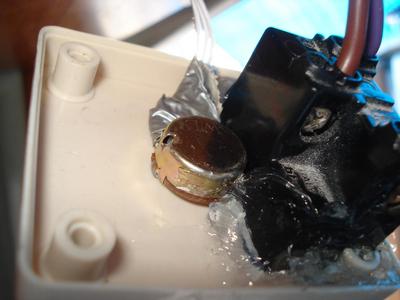
Breaking up the box with print from the lit was the trick.
The box would disappear behind the wooden ceiling , the cover and the potentiometer would be mounted to the ceiling.
Building the old (and still necessairy switch) into the cover , leaving some space for the potentiometer.
In a later stage I will also make a cover to hide the switch edges , make a bit facier so to speek.
Look at that , it kinda fits.
And my main objectiv is reached , not making the switchhole bigger than it was.
Front view.
Some TEC-7 to be sure.
Interrupting the main negativ.
The reshaped cover is slightly glued to the ceiling , I didn't want to use screws because you never know if it's to be removed in the future.
I'm always very much aware for not drilling or screwing exessive holes in the interior , they're never to be made invissible afterwards when you dont need them anymore.
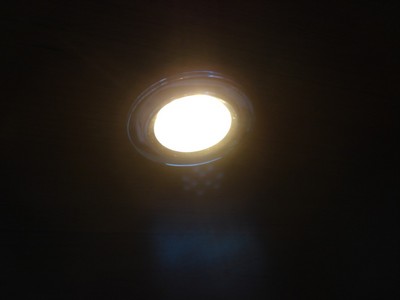
Here's the dimmer at full trottle.
This mode is for evening pleasures

Nice dont you think.
As an addition , while the wooden ceiling was out , I've placed and extra light just above the big fridge , we missed that in the past.
In the end all of this wasn't too much of a hassle.
A days work , a few bucks for a classy upgrade in my opinion.
