Ok , its been more than two weeks now and I guess I can -with relative certainty - say I have solved the problem.
Maybe it's wise to recapitulate the whole story in an well documented report so others can use it as a guide on what to do and what not to do when confronted with a Frigoboat/Danfoss fridge problem.
Malcolm is of course free to publish the essay on the hints and tips forum so it's easy to track and google it.
If he does it would be helpfull to also add the link of this topic since most of the interesting stuff are on these pages.
When reading numerous boards it is striking how many boaters , sooner or later, have issues with their fridges.
I can imagin that for many cooling techniques look like rocket science , but infact it isn't.
All you need are the proper tools , the time and the willingness to deal with the problem.
Getting advise from professionals like Richard Kollmann , Schocktherapy and others helps , no doubt about that.
I'm sure I made some mistakes in my approach , and I've picked up some things along the way .
But I did had my mind set on a blockage of the capilar tube and was certain it would be possible to remove the debri that was causing the malfunction.
I dealt with it on my own (non-professional ) way , but so far so good.
Here we go
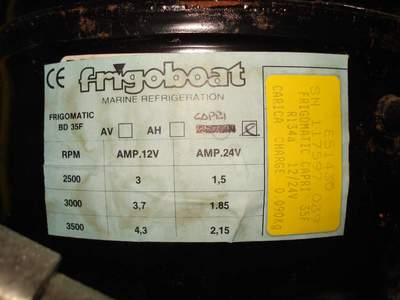
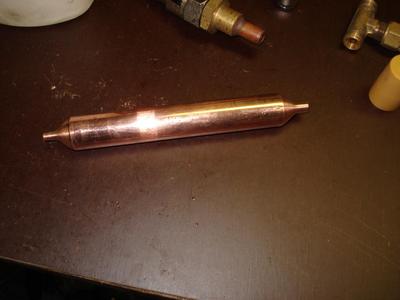
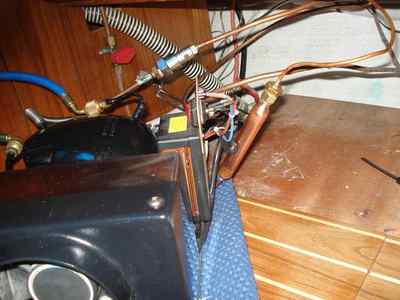
Frigoboat fridge , well known system amounst boaters , of whom some are not that happy with.
Mine was give me hell for some seasons , letting me down on the worsed possible moments , to start cooling again as if nothing ever happened.
Bringing in a technician felt like having to write a blanck cheque and asking myself howmany times he/she would have to return to fix a problem that wasn't there all the time.

After some preparation - reading boards , asking questions here and there - I plonged in.
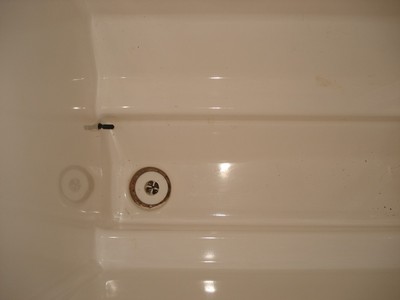
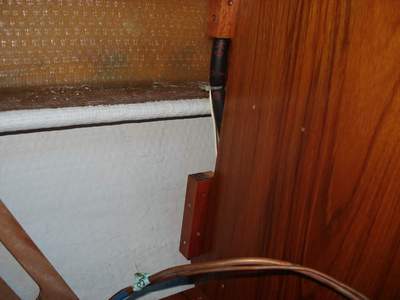
Getting the evaporator out , and try to get it working again.

Easier said than done , the copper tubes are fragile , it's like walking on eggs.

Jeanneau has done a good job hiding and tucking in the installation.
Not much room to fidle around.

If you ever get yours out - the evoporator I mean

- try bringing in a helping hand . This way you prevent damage to the interiour.

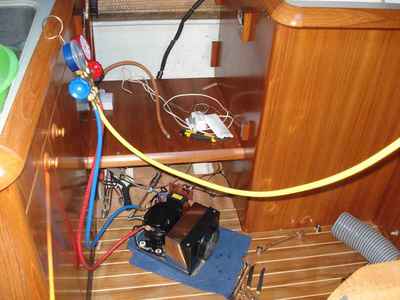
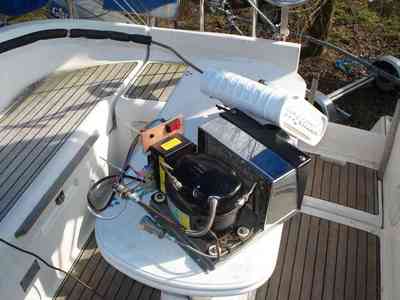
Getting the package to neutral territory , my workshop .
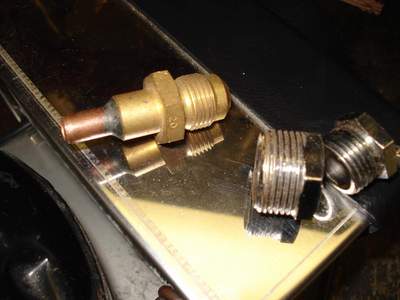
First things first , getting hold of the proper male/female connections to do my thing.
Not that easy , I searched the net but couldn't find. Left me making them myself.
I had some usable connections stashed away .
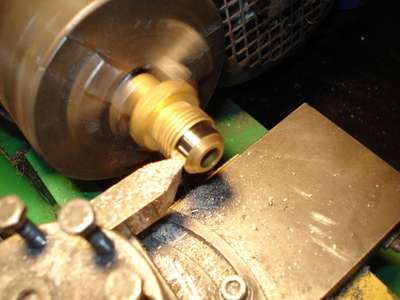
Again , when you have the tools , the sky is the limit.
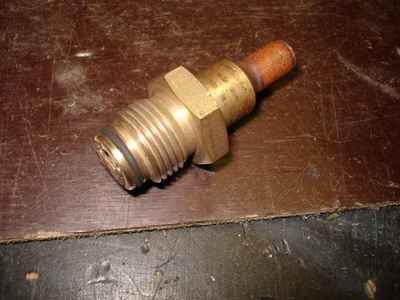
That's the male , and it turned out I didn't need it. But it was fun to make.
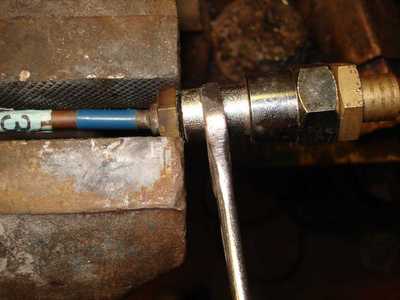
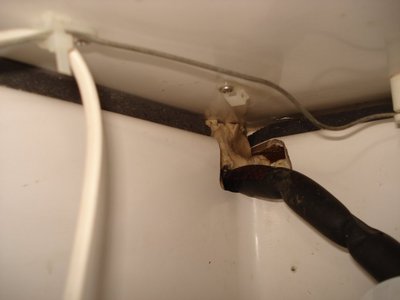
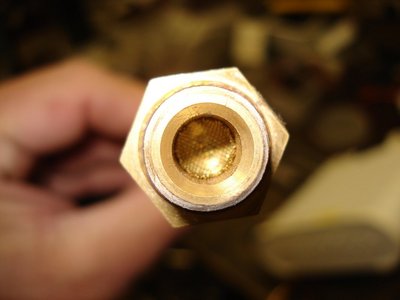
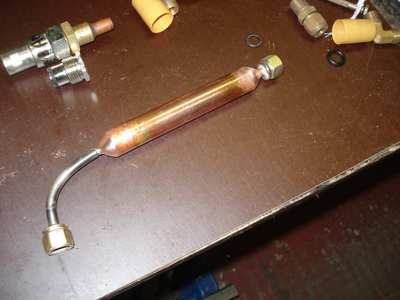
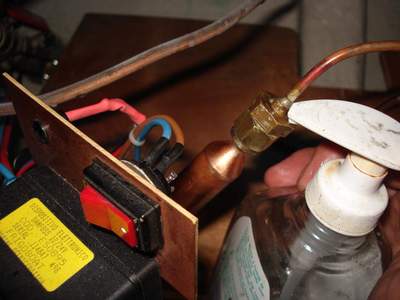
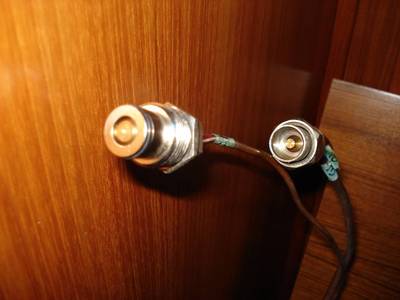
Getting the self sealing couplings off the evaporator circuit so I could start flushing it.
And why not spend a few words on the how these couplings work.
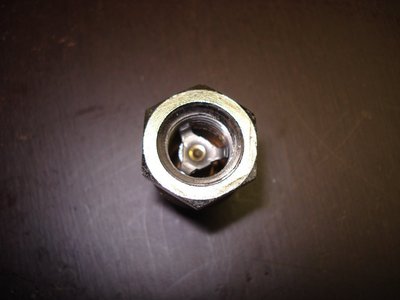
This picture shows the back end , the part that screws on the tube(s).
Very obvious how the sealing principal works.
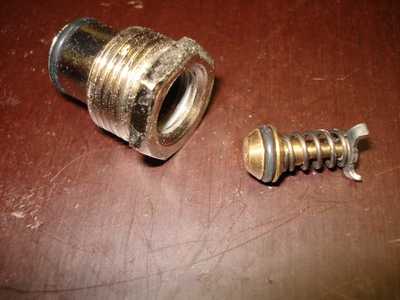
Well , let me tell you something about those selfsealing couplings,.......they dont seal !!
Due to family obligations I wasn't able to focus on the evaporator right away. I left it for a few days and had to establish the refrigerant was gone.
I blamed it on my initial probing of the couplings . After bringing the evaporator to my workshop I immediatly checked the resistance of the springs inside the coupling , letting some gas out of the high pressure side ,as a test.
I was wrong , it wasn't the probing that caused the leakage , it's the weak design itself. I suppose you normally need to cap all the couplings preventing a refrigerant leak. How was I to know that the compressor was undergoing the same fate.
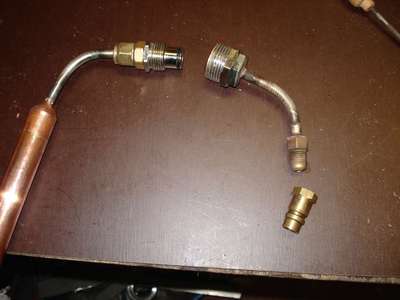
Now this is a very interesting picture. Once the high pressure coupling was off I noticed a small filter inside the capilar tube. No explanation neccesairy I presume.
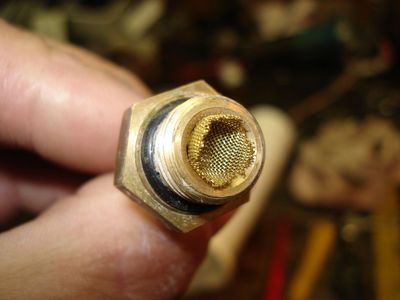
That got me off balance. How could the capilar (orifice) get blocked by drifting debri when this fine mazed filter was there to bring it to a halt. By the way , I did not find any particle on this filter.
Anyway , I had my plan of attack in mind and had no intention of deviating.
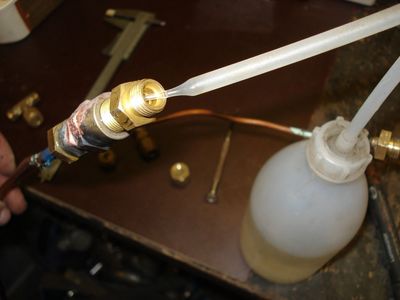
After making (improvising) a connection to the tubes I could bring in the aceton.
I completely filled the evaporator and tubes with that degreasing produkt , then it was time to push it out again.
Using an air compressor and airgun blsting 10 to 12 bar air through the system collecting the aceaton that was squirting out so I could check for impurities. And there where some , a bunch of tiny black things.
I flushed both ways .
Again , it really boggles my mind , I was expecting more rubbish .
The high pressure filter was clear which was in contradictian with all the horrible stories of occasional drifting debri.
I cant help it , but I keep thinking back to the time I had the evaporator heated up to a point where it had never been heated up before and where the fridge suddenly came through.
See post Reply #62 on Mar 16, 2012, 7:42am
Maybe , just maybe the culprit got blown into the compressor's suction for good.
The lord works in mysterious ways I guess.

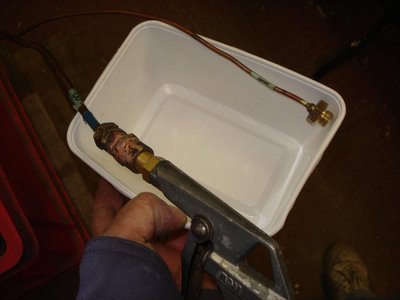
Getting the aceton out afterwards was crucial , that is no doubt an impermissible substance in a cooling system.
Igniting the outcomming mixture would indicated when all the aceton was removed.
I would deal with the remaining air afterwards.
Please note I did remove the rubber O-ring after this picture

Not being sure that the old filter/drier was still up to the job , and to eliminate moisture in the system I decided to add a second filter/drier in the high pressure line.
And instead of using the ' golden ' filter that can be bought on the internet (Gene Santosha supplied the link earlier)http://coastalclimatecontrol.com/Merchant2/merchant.mvc?Screen=PROD&Store_Code=CCC&Product_Code=A50030&Category_Code=access
I decided to make one myself.
This one costs about 5 Euro's shipment included.
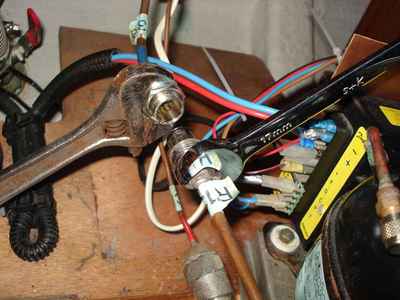
After welding on the the right connections ( which I had in store , lucky me) I needed to make a few bibs and bobs to fill up the evaporator system with refrigerant before reconnecting it to the compressor after installing everything.
I was still confidant the compressor remained loaded with refrigerant , how wrong could I be.
So , that 's settled ,.
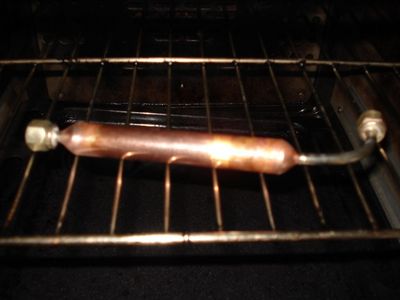
Drying the aluminium oxide in the oven.
I often do that when I refill the filters of my scubatank-compressor.
Capping the (filter/drier) ends prevents moisture in the filter.

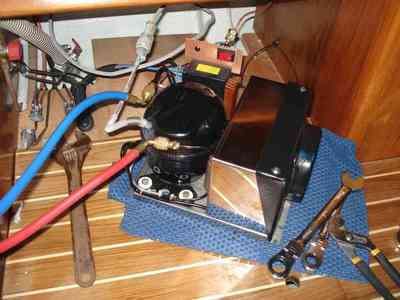
Once the evaporator and compressor where back on the boat , and after wrestling with the evaporator to get it back in again , it was time to fill and flush the evaporator circuit.
I didn't bring my vacuumpump because I was still under the impression that the compressor was full.
Using the pump on just the evaporator system was of noi use I thought. I would flush the air out.

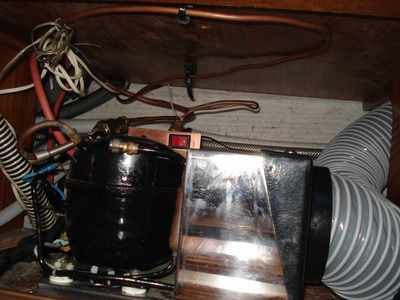
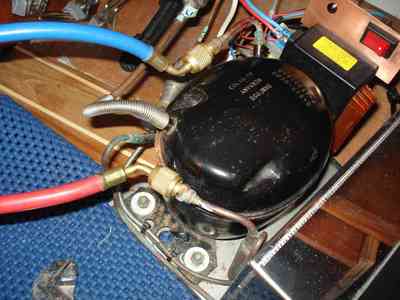
Just a picture of my repainted compressor , isn't that a beauty .
I even polished the SS casing , leaves me to the make a printout of the label that was removed for the paint job , stick it on and this compressor looks like it's straight from the store's shelf.
The white sparks on top are dust , just that you know

After refueling the evaporator circuit and flushing generously with refrigerant to get the air out , reconnecting the compressor was the first goal.
I read somewhere that is vital to install a filter/drier vertical. That way the refrigerant is forced to pass through the AluOxide .
When placed horizontal it can slide over it you see.
Then I was in for a cold shower.
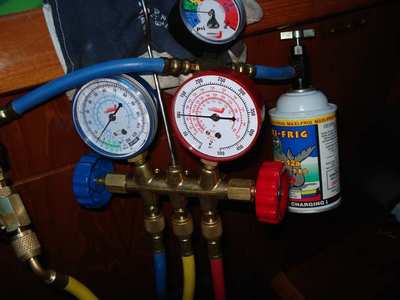
After connecting everything it was showtime.
Starting the unit and checking all the pressures and evaporator cooling.
And you know what ?
Nothing happened.
The low pressure was indicating a vacuum , meaning a lack of refrigerant.
There is such a thing as causality , and the evaporators leaking selfsealing coupling had me presume the same thing occured to the compressor.
Ok , time to get in the reserve troopers.
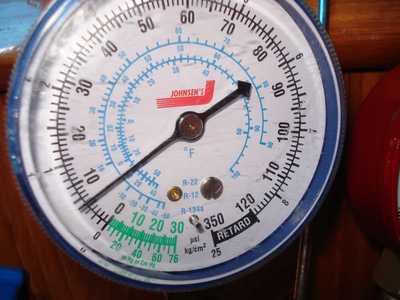
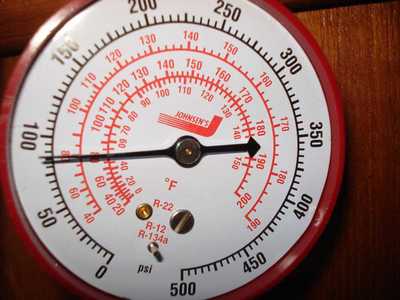
And you already had a glance on the gauges right ?
Suction is perfect , discharge pressure was as Richard Kollman said it has to be.
And here I would like to appologize to him concerning a remark I made in the following post Reply #77 on Mar 22, 2012, 5:48am »
I implied that he said earlier the high pressure should be 50 PSI.
That was not correct , because after reading all the posting again he clearly stated the high pressure should be 100 to 110 PSI.
After some running time (the fridge was cooling like a mid-winter day on Antartica) I noticed the pressures rising somewhat , also the compressor suction was freezing up . That could only indicate too much refrigerant.
Venting a bit was the proper answer.
Remember folks , this is eco-friendly gas.
Just thought I mention it.
Better safe than sorry , soaping all the connections is a reassurance .
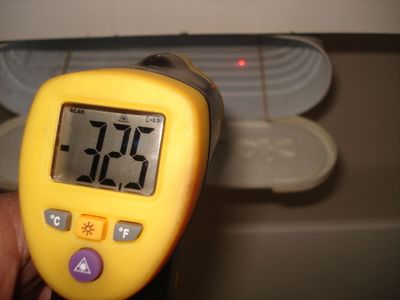
To give you an idea on the cooling capacity .
That is Celcius by the way !
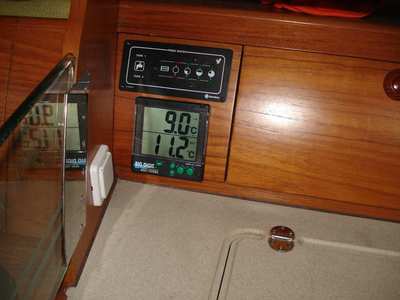
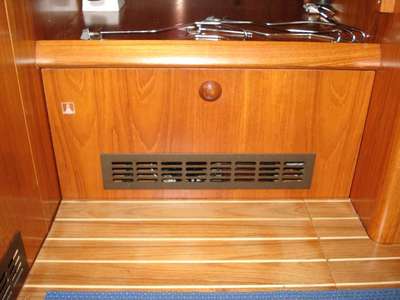
I had this gadget on the boat before adressing the coolunit .
These displays gave me the temp indication of both my fridges.
I always thought it looked kinda amaturish , so why not do a proper job and installing a state of the art tempcontrollers.
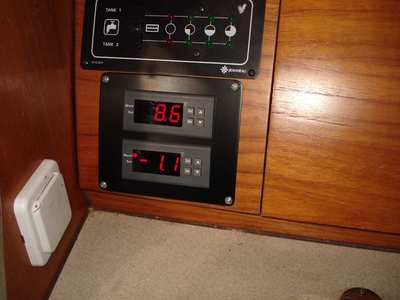
Removed the old panel and made a new one.
These controllers are the real deal .
You guy's (some of you atleast) dont know what these cheap (Chinese) things can do.
They not only give you the temp , the build-in relay can switch whatever you want , be it a heater or be it a coolunit.
All depend on the setting you make.
The top display is my small fridge , something I made on my own , but that's an other story.
The bottom display belongs to the frigoboat fridge.
The small fridge (top) is not working , so the temp is the atmospheric one (not too warm here isn't it

)
On the other you a small led on the left side . That shows the fridge is running.
As an extra , I disconnected the original frigoboat thermostat and both fridges are being controlled by these nice displays.
They allow you not only to set the working temps , you can also set a delta T . Meaning , stop the compressor on (as an example) 3° C , and have it restarted on (for instance) 5 °C .
You can even set a compressor delay of max 10 minutes , that will translate into a blinking led telling you that the comp will start after the preset time. Always a good thing to prevent torque blockage when you start/stop/restart a cooling compressor. It can and probably will stall and worse.
With a push of a button you can turn this fridge controller into heating thermostat too.
Choices , choices , choices.
Let me share the link with you
 www.ebay.nl/itm/270934968818?ssPageName=STRK:MEWNX:IT&_trksid=p3984.m1497.l2649
I had the temp set on minus 5° C .
Here the temp was already minus 1,1 ° C and dropping.
My fridge is back with a vengeance

The sensor is way down the fridge , there are pro's and cons for that. I tried to deal with that in the next pic.
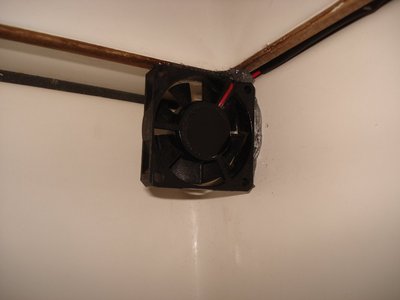
A small ventilator circulating the air ever so gently around the inside. The vent will only be operational when the compressor is on. It's pointed to the evaporator to capture the cold and spread it around.
I know , creating a circulation in a fridge has equal advantage as it has a disadvantage.
The cold will be uniform , but maybe the power consumption will rise due to the fact that there will be more heat/cold transfer on the inside walls.
I'll just wait and see , the vent can be disconnected in a blink of an eye.
Finishing touch , tywrapping the tubes so no vibrations can cause..... whatever.
Case closed (I hope
)


 - try bringing in a helping hand . This way you prevent damage to the interiour.

 )
)


