How I installed digital tank gauges on my Sun Odyssey 469
Oct 12, 2021 3:47:00 GMT
Post by virtualburton on Oct 12, 2021 3:47:00 GMT
Hi all - this is intended to help anyone who is contemplating or working on their gauges. I just installed a Simarine Pico system in my 2013 Sun Odyssey 469 and integrated all of the tanks. Here are some specifics that may save you some time - it took me a few weeks to figure all of this out.
Starting with the easiest:
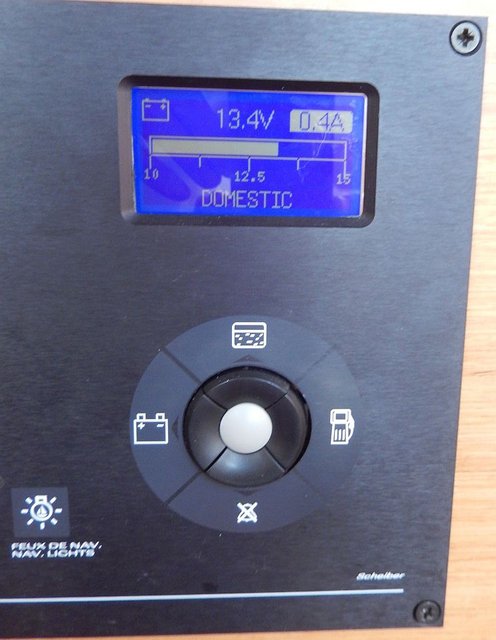
Fuel tank using Simarine Pico:
Fuel on my boat is a 2 wire Resistive type sender. All you have to do is unplug the 2 factory connectors from the top of the gauge and connect one side to ground and the other to the resistive signal. On the Simarine Pico, there are numerous ways to connect a resistive input, and all of their products also have a ground connection on the shunts. Connect the ground from the sender to the ground on the submarine shunt GND, connect one of the resistance inputs (labeled R1, R2, etc.) to the other side fo the sender. Now, on the scheiber panel, you can cut the wire to the aft side of the panel in the large white connector marked "JC1" fuel and connect it to the Simarine R1 input. In my case, I installed the SC503 Simarine Shunt under the Port bed near all the other switches and ran a short wire right to the R1 on this shunt.
To calibrate it, take out the 6 screws that hold the sender in the tank under the bed in the port aft cabin. Lift it out of there tank and lift it all the way up (full) and connect a multimeter to the 2 terminal on the top and read the resistance. My full measured 184 Ohms. now move the float all the way down and measure the resistance. On my boat it was 4 ohms. Set 2 calibration points, one for 0l to 4 ohms, one for 237l to 184 ohms.
Water Tanks:
I wanted to tie both water tanks into the system as well. I found that the water tank senders are electronic Scheiber units which obtain a convert resistance from probes in the tanks to a voltage. there is a small unit mounted in near the charger behind the panel in starboard aft cabin. It looks like this:

You only need to worry about the connector circled in red. That connector has power (red), a ground (Black) and a voltage signal out (purple). What I learned is the Scheiber sends power down from panel to this unit when you push the switch on the scheiber panel, then it returns a signal voltage through the purple wire back up to the scriber connector.
The foreword tank is the same and it's wire is call JE1. The aft tank is JE2.
In my case I installed Simarine digital SCQ25T in behind the Scheiber panel, so I connected the water tanks to it there. I ran the purple JE1 to U1 on the SCQ25T and the purple JE2 to U2. Last, I cut both of the reds for JE1 and JE2 and wired them together from the 3rd and last U3 terminal on the SCQ25T. This means on my boat, the senders are powered all the time. This is so I don't have to press the Scheiber button in order to get a reading, especially for using the mobile app. I think the current draw will be inconsequential but will check it.
Here's a photo of the connections on the scheiber panel:

Holding (Waste) tanks:
On my boat, I chose the SCAD external tank senders and their double gauge. I later decided to use the Simarine Pico so really don't need the gauge, but that's OK.
The senders are 2 2" wide strips of foil that are installed on the outside of the holding tanks. The aft cabin is fairly easy because you can remove all wood panels so can access the whole tank. In the forward head, you can't get to the bottom of the tank. In my case, I bought a 1 metre long aluminum ruler. I started the tape at the top of the tank and got as far as I could reach, then I gently pushed the tape down in the small space between the panel and the bottom of the tank and slowly pulled off the backing with my other hand. It worked great and didn't take long.
Next, you stick the contacts on to each of the pieces of metal tape, last stick the electronics on and you're done installing the sender. Now, you have to connect the power and signal wires.
Like the water tanks, these are voltage, not resistive signal senders so your system is reading a voltage for the level. I ran 24 gauge 3 conductor tinned wire down the port side behind all the panels and obstacles. I also ran 2 conductor red and black to a fused panel and to the gauge to power it. The Jeanneau is well designed and with a bit of creativity it's quite easy to access anywhere. I made sure to use the existing wiring routes and tied everything down.
Last, I connected the white wire (power from the SCAD gauge to the reds (power to the electronics for both tank senders). The black wire to the 2 grounds and then the blue wire to my aft holding tank sender and the brown one to my fwd tank. Last, I calibrated the SCAD gauge and was done. Their instructions are involved but easy enough if you take your time.
Now, I later (this weekend) decided to re-wire these to my Simarine so all I did was connect the red power supply to the 2 power supplies to my sender units, and the same with the black grounds. Last, I connected the 2 signal wires to the second Simarine SC503 shunt that I installed in the port, after cabin under the bed to measure the current draw of my Inverter when it's running. This shunt has 2 voltage inputs on it, U1 and U2. I connected the forward signal wire from the fwd holding tanks sender to U1 and the aft signal to U2.
Last, I went to the Simarine Pico and added the tanks and configured them. I added the following configuration points for all tanks. If you have Jeanneau with the same Scheiber senders and fuel sender yours are probably (but I guarantee nothing!) the same.
Fuel - as shown above
Water - from this table, and for the values I entered:
AFT (235l tank)
0 - 1.1 volts
25% - 59l - 2.2v
50% - 118L - 3.3V
75% - 176L - 4.5V
100% - 235L - 5.6V
FWD (400l Tank)
0 - 1.1V
25% - 100l - 2.2v
50% - 200l - 3.3V
75% - 300l - 4.5V
100% - 400l - 5.6V

For the SCAD sensors, I pumped out both tanks so they were empty and then in the Pico set the calibration points:
- Empty - 0 litres to the current measured voltage (it was 1.569 volts on my boat)
- Full - 80 litres to 5.0 volts
They seem to be working great and like the water, I have them powered on all the time so I have them "live" on the app.
I hope this has been helpful for someone,. I have gotten so much help and support from this forum I really wanted too give something back. Feel free to DM with any other questions or if you need more screenshots, etc.
Thanks,
David
Starting with the easiest:
Fuel tank using Simarine Pico:
Fuel on my boat is a 2 wire Resistive type sender. All you have to do is unplug the 2 factory connectors from the top of the gauge and connect one side to ground and the other to the resistive signal. On the Simarine Pico, there are numerous ways to connect a resistive input, and all of their products also have a ground connection on the shunts. Connect the ground from the sender to the ground on the submarine shunt GND, connect one of the resistance inputs (labeled R1, R2, etc.) to the other side fo the sender. Now, on the scheiber panel, you can cut the wire to the aft side of the panel in the large white connector marked "JC1" fuel and connect it to the Simarine R1 input. In my case, I installed the SC503 Simarine Shunt under the Port bed near all the other switches and ran a short wire right to the R1 on this shunt.
To calibrate it, take out the 6 screws that hold the sender in the tank under the bed in the port aft cabin. Lift it out of there tank and lift it all the way up (full) and connect a multimeter to the 2 terminal on the top and read the resistance. My full measured 184 Ohms. now move the float all the way down and measure the resistance. On my boat it was 4 ohms. Set 2 calibration points, one for 0l to 4 ohms, one for 237l to 184 ohms.
Water Tanks:
I wanted to tie both water tanks into the system as well. I found that the water tank senders are electronic Scheiber units which obtain a convert resistance from probes in the tanks to a voltage. there is a small unit mounted in near the charger behind the panel in starboard aft cabin. It looks like this:
You only need to worry about the connector circled in red. That connector has power (red), a ground (Black) and a voltage signal out (purple). What I learned is the Scheiber sends power down from panel to this unit when you push the switch on the scheiber panel, then it returns a signal voltage through the purple wire back up to the scriber connector.
The foreword tank is the same and it's wire is call JE1. The aft tank is JE2.
In my case I installed Simarine digital SCQ25T in behind the Scheiber panel, so I connected the water tanks to it there. I ran the purple JE1 to U1 on the SCQ25T and the purple JE2 to U2. Last, I cut both of the reds for JE1 and JE2 and wired them together from the 3rd and last U3 terminal on the SCQ25T. This means on my boat, the senders are powered all the time. This is so I don't have to press the Scheiber button in order to get a reading, especially for using the mobile app. I think the current draw will be inconsequential but will check it.
Here's a photo of the connections on the scheiber panel:
Holding (Waste) tanks:
On my boat, I chose the SCAD external tank senders and their double gauge. I later decided to use the Simarine Pico so really don't need the gauge, but that's OK.
The senders are 2 2" wide strips of foil that are installed on the outside of the holding tanks. The aft cabin is fairly easy because you can remove all wood panels so can access the whole tank. In the forward head, you can't get to the bottom of the tank. In my case, I bought a 1 metre long aluminum ruler. I started the tape at the top of the tank and got as far as I could reach, then I gently pushed the tape down in the small space between the panel and the bottom of the tank and slowly pulled off the backing with my other hand. It worked great and didn't take long.
Next, you stick the contacts on to each of the pieces of metal tape, last stick the electronics on and you're done installing the sender. Now, you have to connect the power and signal wires.
Like the water tanks, these are voltage, not resistive signal senders so your system is reading a voltage for the level. I ran 24 gauge 3 conductor tinned wire down the port side behind all the panels and obstacles. I also ran 2 conductor red and black to a fused panel and to the gauge to power it. The Jeanneau is well designed and with a bit of creativity it's quite easy to access anywhere. I made sure to use the existing wiring routes and tied everything down.
Last, I connected the white wire (power from the SCAD gauge to the reds (power to the electronics for both tank senders). The black wire to the 2 grounds and then the blue wire to my aft holding tank sender and the brown one to my fwd tank. Last, I calibrated the SCAD gauge and was done. Their instructions are involved but easy enough if you take your time.
Now, I later (this weekend) decided to re-wire these to my Simarine so all I did was connect the red power supply to the 2 power supplies to my sender units, and the same with the black grounds. Last, I connected the 2 signal wires to the second Simarine SC503 shunt that I installed in the port, after cabin under the bed to measure the current draw of my Inverter when it's running. This shunt has 2 voltage inputs on it, U1 and U2. I connected the forward signal wire from the fwd holding tanks sender to U1 and the aft signal to U2.
Last, I went to the Simarine Pico and added the tanks and configured them. I added the following configuration points for all tanks. If you have Jeanneau with the same Scheiber senders and fuel sender yours are probably (but I guarantee nothing!) the same.
Fuel - as shown above
Water - from this table, and for the values I entered:
AFT (235l tank)
0 - 1.1 volts
25% - 59l - 2.2v
50% - 118L - 3.3V
75% - 176L - 4.5V
100% - 235L - 5.6V
FWD (400l Tank)
0 - 1.1V
25% - 100l - 2.2v
50% - 200l - 3.3V
75% - 300l - 4.5V
100% - 400l - 5.6V
For the SCAD sensors, I pumped out both tanks so they were empty and then in the Pico set the calibration points:
- Empty - 0 litres to the current measured voltage (it was 1.569 volts on my boat)
- Full - 80 litres to 5.0 volts
They seem to be working great and like the water, I have them powered on all the time so I have them "live" on the app.
I hope this has been helpful for someone,. I have gotten so much help and support from this forum I really wanted too give something back. Feel free to DM with any other questions or if you need more screenshots, etc.
Thanks,
David