Jim, that is really useful thank you - is there anyway to clean and lubricate the furler drum whilst it is still in situ?
I know at some point I will need to do it as you suggest, but wondered if you had any thoughts on a short term fix?
Thanks
------------------------------------------------------------------------------
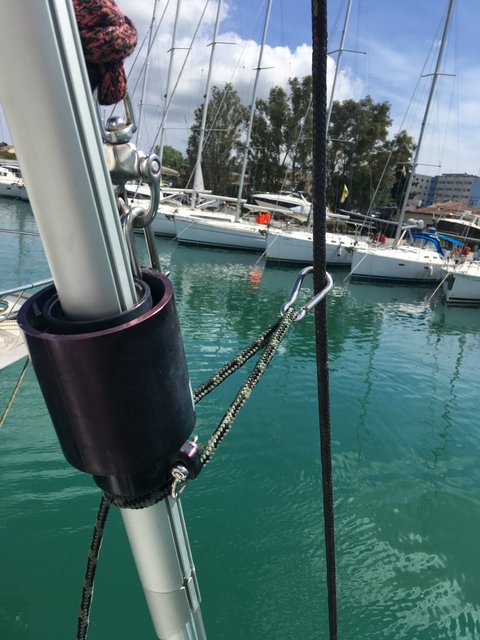
Contrary to the information given by Facnor (and some of their agents)
it is possible to service the LS 180 type Facnor furler. It seems these
furlers have a reputation for becoming very stiff after a few years (in
my case 6 years) to the point that they can only be used with a winch
however, in my case, it was possible to bring it back to virtually as
good as new by cleaning and lubricating.
The first problem is removing the drum from the forestay. This will vary
from boat to boat but the way of doing this on the SO 439 was to slacken
the back stay off completely, attach two halyards to a strong point on
the stem fitting (spinnaker or code 0 attachment point for example),
measure the distances between the threads of the shrouds with vernier
type calipers so you know how much to re-tighten afterwards, slack off
the shrouds and harden up on the halyards so as to take any pressure off
the forestay. This will allow the forestay to be detached from the stem
fitting.
Unscrew the grub screws in the foil and the Allen bolt on the top of the drum that holds
the 'feeder' piece and the telescopic section in place and slide this
section up (best to try and tape the telescopic section or hold it up
with a spare halyard to stop it continually sliding down – be careful the dark grey plastic bearing inside the foil itself does not fall out).
Remove the clevis pin type bolt with the split pin at the base of the forestay
(dont try to undo the bolt with nyloc nuts as trickier to get back on)
and once the stay is free, just slide the drum off the end. Tie the loose stay to the pulpit or rail to stop it swinging around.
It is best to work on the furler somewhere where pinging circlips and
bearings do not go over the side! There are 4 long bolts on the top that
need to be removed and the top cap then comes off. The construction of the
bearing unit is now apparent - an inner metal tube (through which the
forestay goes) and an outer tube, and between the two are the bushes and
bearings that allow it to turn. You can then see the first circlip that
needs to be removed so as to get to the bearings. You will need a
medium/large pair of internal circlip pliers to get this out and then
you will see a white delrin/nylon bush. By tapping the housing upside down this
can be manoeuvred to the top and then prised out with a something
suitable (the points of two pairs of dividers from the chart table
worked well!) The next circlip is an external one around the inner tube that
goes round the forestay. Carefully remove and the ball race should now
be exposed. Lift out the top ring holding the torlon balls and then the
bottom ring (the balls are free once the top ring is off so remove with
care).
The furler and its bushes and bearings are the technical equivalent of a 'palindrome', a symmetrical arrangement with a
ball race sandwiched between two delrin/nylon bushes. The sequence of parts that make up the unit itself listed
from top to bottom is as follows:
- Internal large circlip - top
- delrin/nylon bush
- smaller external circlip
- top half of ball race
- torlon ball bearings - middle
- bottom half of ball race
- smaller external circlip
- delrin/nylon bush
- large internal circlip - bottom
The cause of the stiffness was immediately obvious - the circlips are
mild steel and had rusted. The circlips still functioned but all the
loose scale and associated muck had clogged the ball race and the rusty
circlips had expanded (with all the scale) to create increased pressure
within the assembly which had added to the overall friction. It was
possible to clean the circlips, bearing races, etc, with a wire brush
and/or toothbrush and WD40 and then spray with silicon and, once
reassembled, it spun like a top.
The hardest part is getting the forestay back on the stem fitting - the
weight of the forestay with the foil attached causes it to sag slightly
which means it will be too short to get the clevis pin back
through the eye on the end of the forestay. We found the best way was to
tie a length of dyneema to the forestay just above the eye and then pull
it down as hard as possible through the jaws of the attachment point and
secure to a cleat on the pontoon so as to get the eye to line up with
the tang so the pin could slot back in. This was a two man job.
The furler should have been fitted with stainless steel circlips in the first
place and when it starts to rust again as it inevitably will then the
same procedure will have to be repeated but this time replacing the mild
steel circlips with stainless ones.
It was quite a time consuming job but not technically difficult and the only specialist tools required were circlip pliers. Unfortunately I did not get any photographs but it was all fairly logical once you got the top circlip off.


 ).
).


