|
|
Post by Zanshin on Dec 3, 2022 13:19:13 GMT
I've got 2 electric Jabsco heads aboard. I need to work on the pump assembly (again) and access to the back is almost impossible. Particularly difficult is resealing the O-ring as it is vertical and hidden. I've spent literally hours trying to seat this O-Ring before. You think it is set, tighten everything and once I pump water into and out of the toilet it leaks so I have to start again (and clean up the mess). One suggestion I got that made a lot of sense was to remove the whole toilet from the floor and turn it over. This is brilliant, as only 3 bolts hold it in place. I was about to start a couple of minutes and then realized that I didn't know if the bolts were captured underneath the pan of the head floor! I have looked and don't see any way to get underneath the pan if the bolts are NOT captured. Has anyone here worked on the mounting for Jeanneau heads and knows the answer? 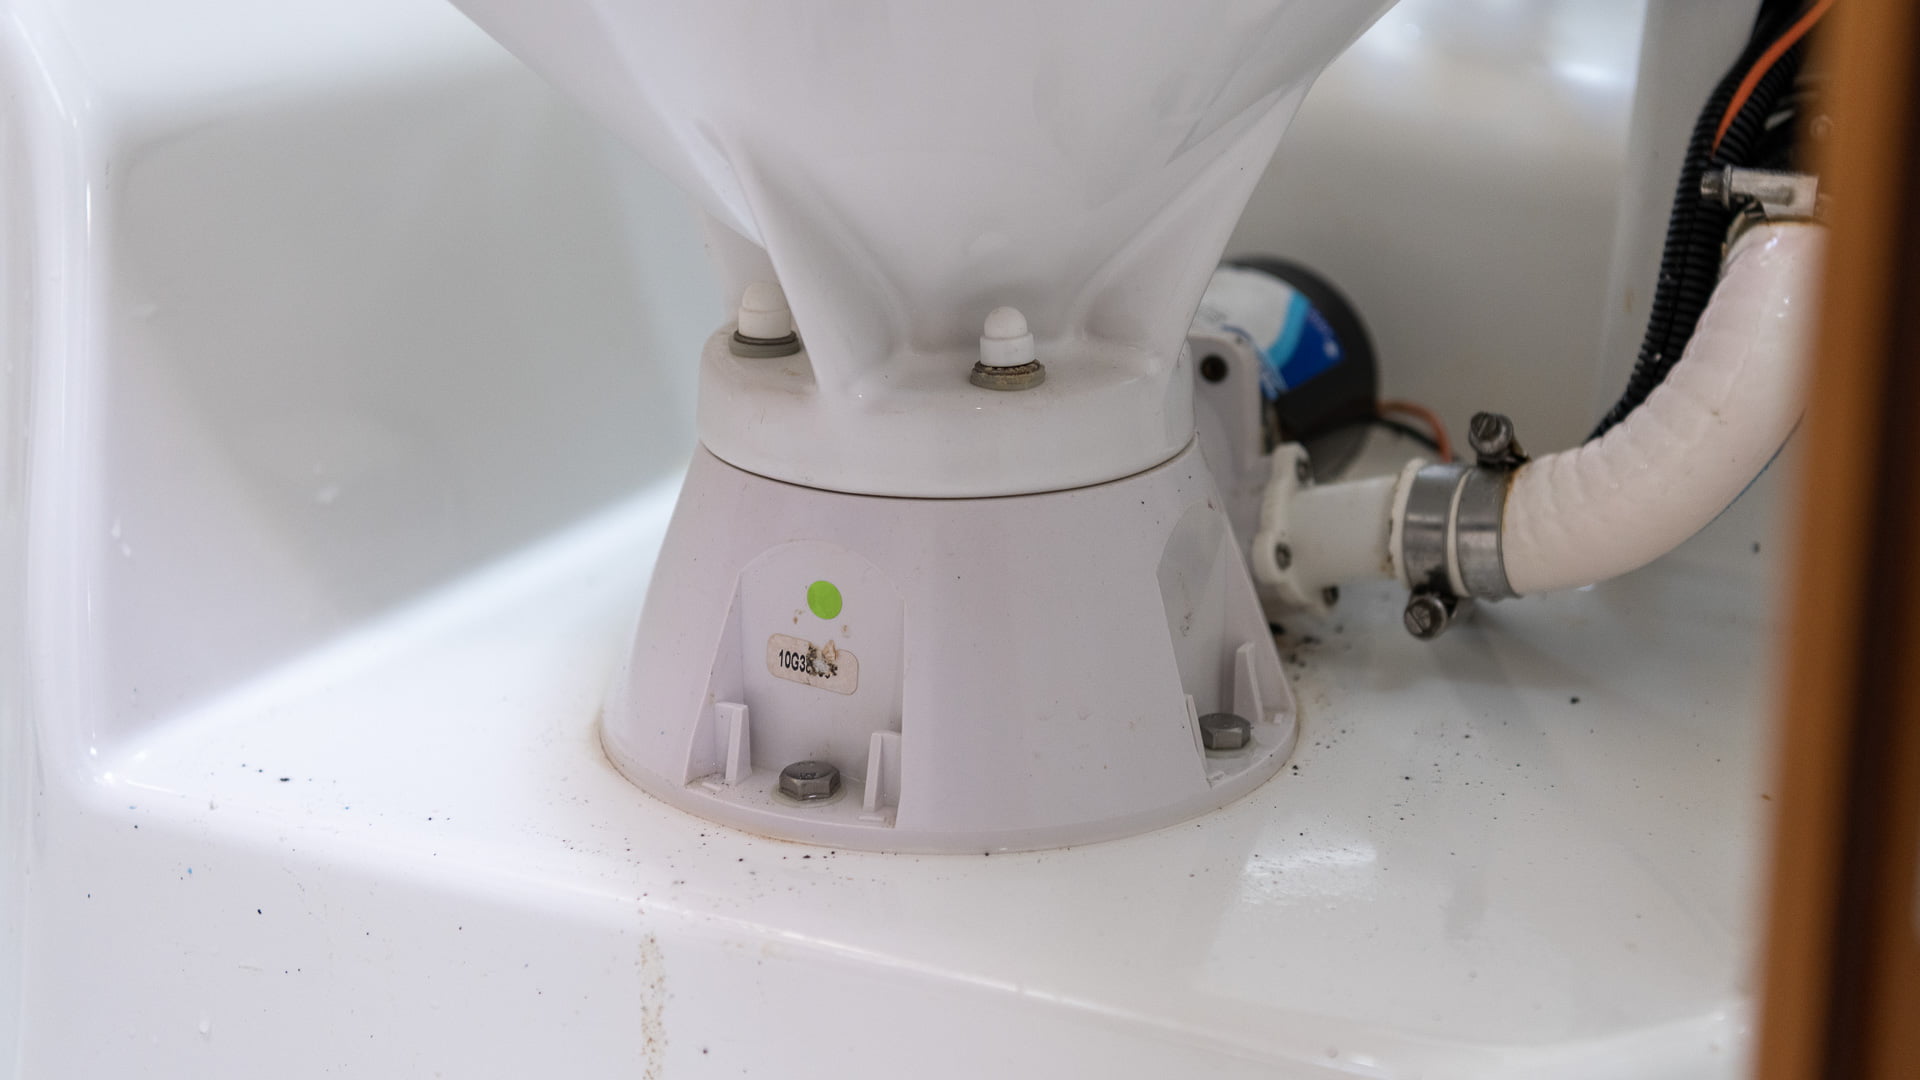 |
|
|
|
Post by ianf on Dec 3, 2022 13:35:17 GMT
I've worked on the exact same model many times and can tell you that on mine the bolts that hold the unit to the floor are not captive.On the SO2DS you can get to the nuts (and washers) under the floor fairly easily via the access hatch to the sea cock just try not to drop them. I've had to have a few failures seating the seat the O-ring for the motor mount and, as you say, it is a real pain having to do it all over again but nil desperandum you will get there in the end  |
|
|
|
Post by Zanshin on Dec 3, 2022 14:17:37 GMT
Thanks ianf. In this forward head there are two openings in the shower pan, and both are much further away than an arm's reach. I just remembered that I bought a borescope and am charging the battery now. I'll snake that in and under and take a look at the nuts from underneath. Jeanneau really should have thought of this. I suppose they assemble the head while it is still outside the cabin, and it wouldn't take much effort or cost to put a dab of Sikaflex or 5200 on the nuts |
|
|
|
Post by Don Reaves on Dec 3, 2022 15:09:58 GMT
I have some silicon lubricant that's quite sticky. If you used something like this on the O-ring, it might have a better chance of staying in place while you reassemble things. Also, consider using the borescope to examine the O-ring before reassembly if you can't see it adequately otherwise.
|
|
|
|
Post by Zanshin on Dec 3, 2022 15:33:30 GMT
I've used various sticky lubricants on the O-Ring before, all to no avail. I finally got my borescope working and just took a look under the shower pan. The bolts are indeed not captured, so I'm not going to be removing the base in order to make the rest of the work easier.
|
|
|
|
Post by Zanshin on Dec 3, 2022 20:07:47 GMT
I've just tried some Lanocote (very sticky lanolin) on the final O-Ring installation but that didn't work. I cleaned everything off and used Loctite Red in the groove and let it cure for about 10 minutes before attempting the installation. I worked like a charm!!!
|
|
|
|
Post by jy51 on Dec 5, 2022 8:12:59 GMT
I've used various sticky lubricants on the O-Ring before, all to no avail. I finally got my borescope working and just took a look under the shower pan. The bolts are indeed not captured, so I'm not going to be removing the base in order to make the rest of the work easier. Just a silly thought! How thick is the fibreglass floor structure that the toilet bowl bolts go through? Would it be possible to reassemble using bolts that are designed to expand and grip from behind, as used in plasterboard walls.? |
|
|
|
Post by loredo on Dec 5, 2022 8:51:30 GMT
I've found that the (only) easy way to deal with these toilets is to dismantle them completly. Take off all hoses (heating the hoses makes this way easier). Take off the bowl from the base. Undo the screws that hold the base to the fiberglass. The whole operation takes maybe ten minuts (IF that) but makes dealing with whatever part much easier. Especially the un-nerving O-ring.
One thing though, Jeanneau seals the screws (Screws NOT bolts!) with toilet wax. In Europe, I've never been able to find that product so I'm using just a tiny bit of silicone sealant. BTW, under the fiberglass theres a wooden "backing plate". The screws holding the toilet base to the boat find their "holding power" in the wood not the thin fiberglass! I hope the immage shows up.... 
|
|
|
|
Post by Zanshin on Dec 5, 2022 11:00:37 GMT
loredo - I'd love to do this but cannot. The bowl screws can't be removed because the nuts underneath aren't captured and that means I can only reassemble if I remove the base. I can't remove the base because those nuts aren't captured, and I cannot access underneath the pan to put them back on. I used my borescope to look underneath the shower pan and Jeanneau did not use a wooden backing plate here. In a pinch I could cut out the center part of the pan under the bowl and access a backing plate or bolts from there, but I'm not ready to do that yet. And after assembling everything again, using a small amount of Loctite to keep the O-Ring in place there's still a small drip leak when running the toilet. This means I get to do it all again. But the anchorage was very rolly yesterday and there was no wind, so it was very uncomfortable belowdecks. Luckily, I have 3 heads aboard (one manual, just in case I lose electrical power) so I've got a backup plan.
|
|
|
|
Post by loredo on Dec 5, 2022 14:58:48 GMT
Zanshin,
sorry I don't understand exactly, I think you've mixed up a couple words... Let me see, the bowl is fixed to a plastic base. (Plastc base = That would be where the motor is fixed to.) The plastic base in turn then is bolted to the fiberglass / wood of the boat. The bowl itself is attached to the plastic base with four 6mm bolts (10mm nuts). If its those four that are your problem, hold the head of the bolt with a plier to undo the nut(s). Tightening those four is simple once the plastic base has been taken out. If instead it's the three (?? 4???) screws holding the toilets plastic base to the boats fiberglass, well then... you need to shoot them folks @ Jeanneau. YET, I've taken off all three heads in my JY57 without problems. All of them have the wooden backing plate under them, much as what you'd see under a winch or stopper. Previous boat, SO49, was the same. I find it hard to believe that they would put a bolt with nuts in that position IMPOSSIBLE to reach the nuts! Really? Wait! Your problems might not be over yet. On the SO49 I've fought with a slight drip for a couple seasons. Changing orings several times, only to find out that the plastic base had a hair-crack around one of the screws holding the macerator. Only cure here was to change the plastic base...
Wish you best of luck with this endevour!
Loredo
|
|
|
|
Post by Zanshin on Dec 5, 2022 16:18:58 GMT
Let me put it differently:
1. The base to bowl attachment is done with 4 bolts and nuts. These are not captured inside the base, so in order to loosen or tighten these the base needs to be removed so that one can get to both sides of the bolt and nut.
2. The base is attached with 3 bolts and nuts. From what I saw with the endoscope, if I remove the bolts from the top then the nuts will fall down. I cannot reach around inside the shower pan fiberglass to hold the nuts in place. I will check again, but I did not see a wooden backing and even if it were there, how are the nuts held on? If they aren't held on, I can't think of a way to replace them upon reassembly.
How were the nuts connecting the base to the showerpan/backing plate held on in your J57?
I think this is sort of Schrödinger's Cat situation; I have to consider the bolts captured and uncaptured until I remove them and find out for certain. But unlike that thought experiment, if I'm wrong then it is going to be a lot of effort to fix.
I did have a hairline crack in the motor mounting plate, but I replaced that along with the gasket and O-Ring seals. Perhaps I didn't seal the O-Ring correctly and that is going to be my first try once I get around to working on the head again. Luckily, I haven't used it since the repair so won't have to go the bleach-and-detergent cleaning route again.
Right now, it is almost 30C here because the wind has died down to nothing, but a north swell is rocking the boat around at anchor so I'm going to postpone those activities until conditions get better.
|
|
|
|
Post by loredo on Dec 6, 2022 9:21:49 GMT
Zanshin, I've attached the Toilet's manual to this MSG. On page 5 you find the exploded view of the toilet. The thing is, you CAN tighten the four base to bowl attachment bolts from above, without taking apart the toilet! That job is a bit tedious but it can be done. Don't ask how I know!  Take off the white plastic cover thinghy from the bolts. Hold the top of the bolt with a plier and undo the nut. Now you can take off the bowl. The bolt can NOT fall down since there's another nut holding it on top of the base. See details 7F & 7E & 7B on page 5.
Now, on to how the base is attached. You say "The base is attached with 3 bolts and nuts".
From my experience, that is NOT. ALL toilets I've ever worked on any Jeanneau had some sort of self tapping screw -NOT- bolts and nuts! On my 57 all three (electric) toilets have the kind of self tapping screws like the one in the picture of my previous MSG. I don't know what nuts you've seen with the borescope but I highly doubt it's what's holding the toilet in place.
From what I've seen in my 57 with Jeanneau one can never say never (my direct discharge toilet did not even have a siphon breaker installed...  ) but if they did really used bolts & nuts to hold your toilet in place then that would be weird beyond any nightmare! Or in other words NUTS!
The hairline crack that drove me crazy was in the base of the toilet where the motor is attached to it. I had to replace the base. How would you get the base off if it's held with bolts & nuts? The base is a serviceable part... Hope this helps a bit!
|
|
|
|
Post by John on Dec 6, 2022 14:21:28 GMT
Not sure if this will help , the last time I had to repair the toilet we had a leak where the pipe is connected to the flap plate with four bolts at the base of the toilet after a few attempts still had a small leak , to repair it I used a piece of a bicycle tube inside , this has not leaked since .
|
|
|
|
Post by Zanshin on Dec 7, 2022 17:21:45 GMT
loredo - I took your advice to heart and bit the bullet, unscrewing the 3 bolts in the base. After trying my hand with the endoscope again and this time I did see some wood. 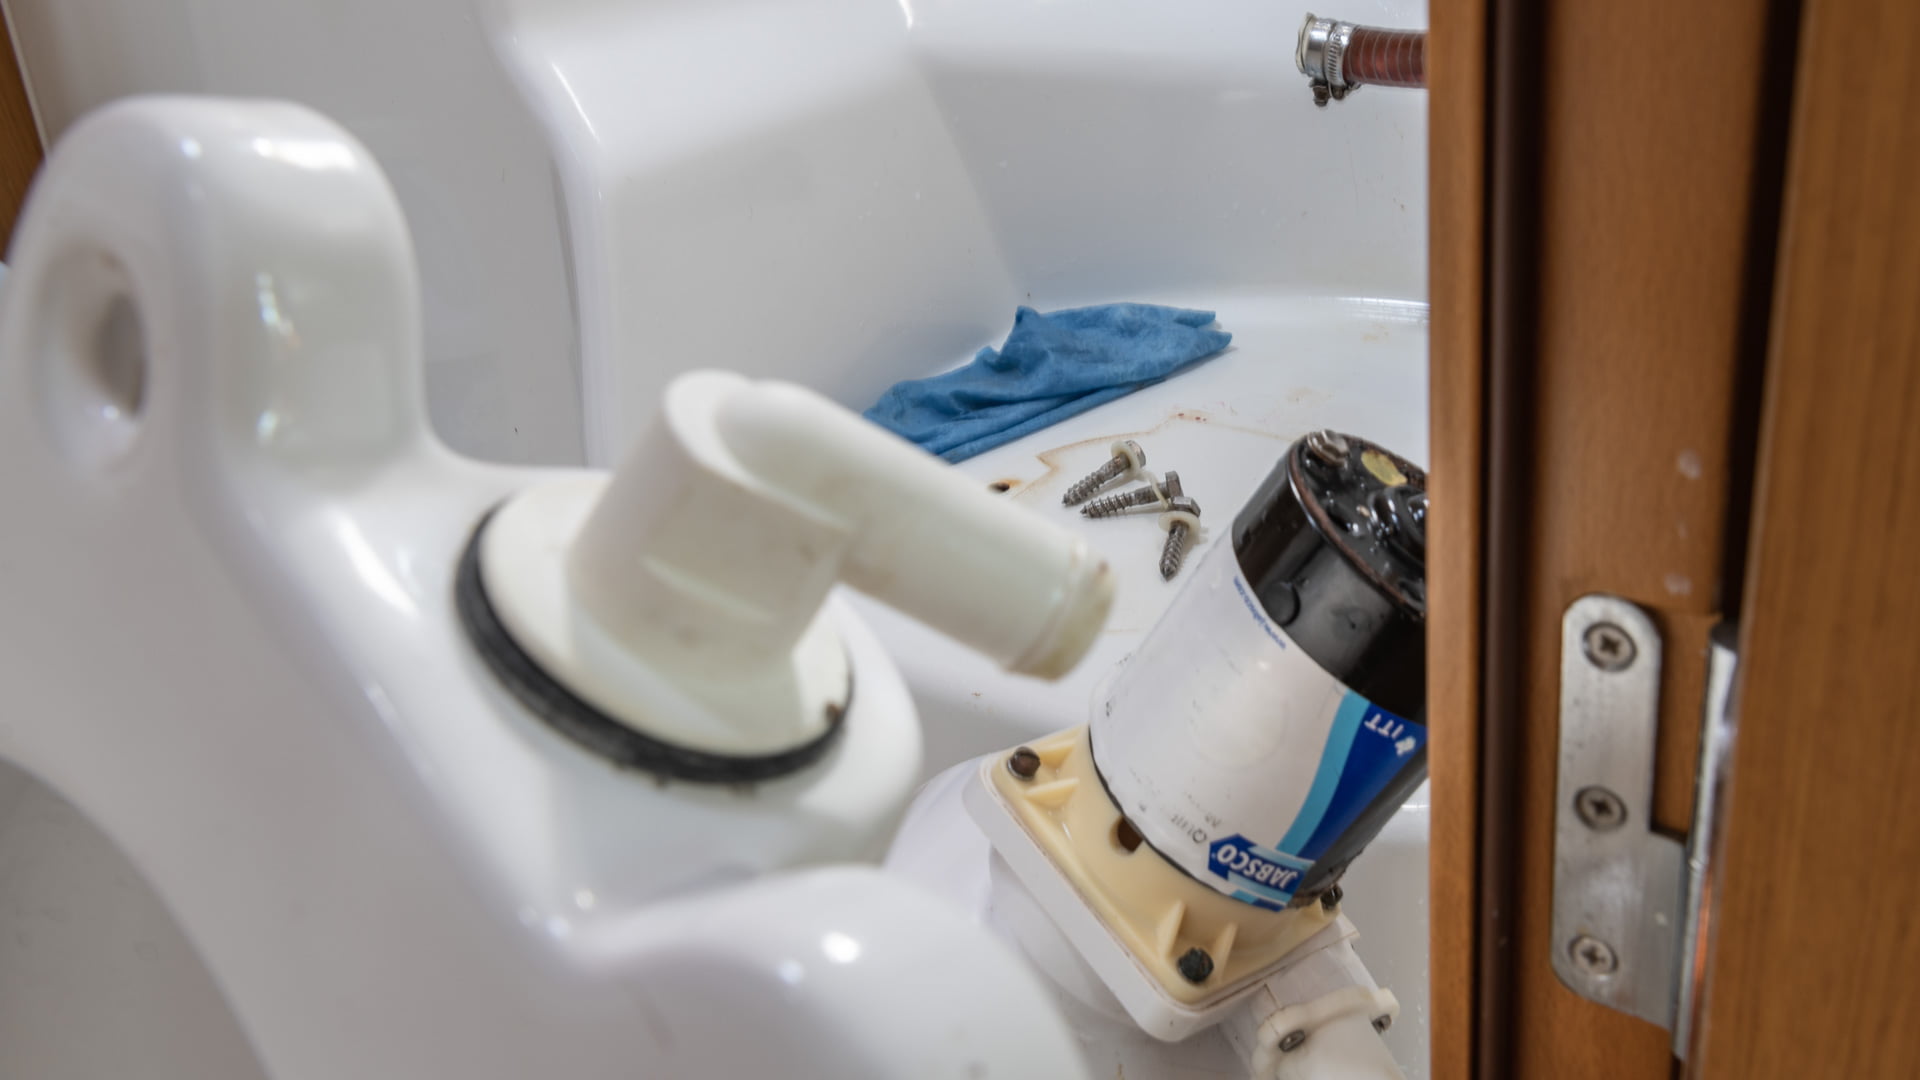
|
|
|
|
Post by Charlie-Bravo on Dec 7, 2022 21:05:57 GMT
Ahaa, so the cat lives ! (Schrödinger's Cat)
As with many things on a boat, even though presented with the ‘apparent’ facts, an enquiring mind, a parcel of tools, and obviously the need to dismantle something to attempt a fix, one thing to me seems to re occur thought wise, …. some one put it together , and so it is reasonable to assume it must be able to be taken apart and then be re assembled.
Not had the pleasure of this particular model of sea toilet myself, or the grand craft to which it is fitted, but have once or twice myself actually considered the possibility, when faced with a seemingly impossible task, that the boat designer started with the item giving grief, (usually fridge components/ chainplates/windlass/ water and fuel tanks/ ….. and now toilets) then proceeded to create a hull around it !! and this is not by any means a Jeanneau exclusive, Moody’s yard actually did fit some items before sending in the joiner to create the cabinetry around it, and we’re quite ingenious in hiding all the fixings, thankfully I find the Jeanneau yard don’t ‘send in the joiner’ to create the internal finish and the hide all the fixings.
With each ‘challenge’ comes wisdom, along with hours of frustration and fiddling, my apprenticeship has been long, but being able to tap into the wisdom discovered by others frustrations and fiddling via the forum , is indeed a great help, a great resource.
Long live this forum (well done Malcolm)
Happy flushing Zanshin (once it’s back together and not weeping)
CB
|
|
|
|
Post by Zanshin on Dec 8, 2022 11:58:36 GMT
It turns out that the base has a hairline crack. I will go ashore in an hour, when the chandlery opens, to see if they have that $200 part. The red discoloration in the image below is from the Loctite red I had applied to keep the O-Ring in place. 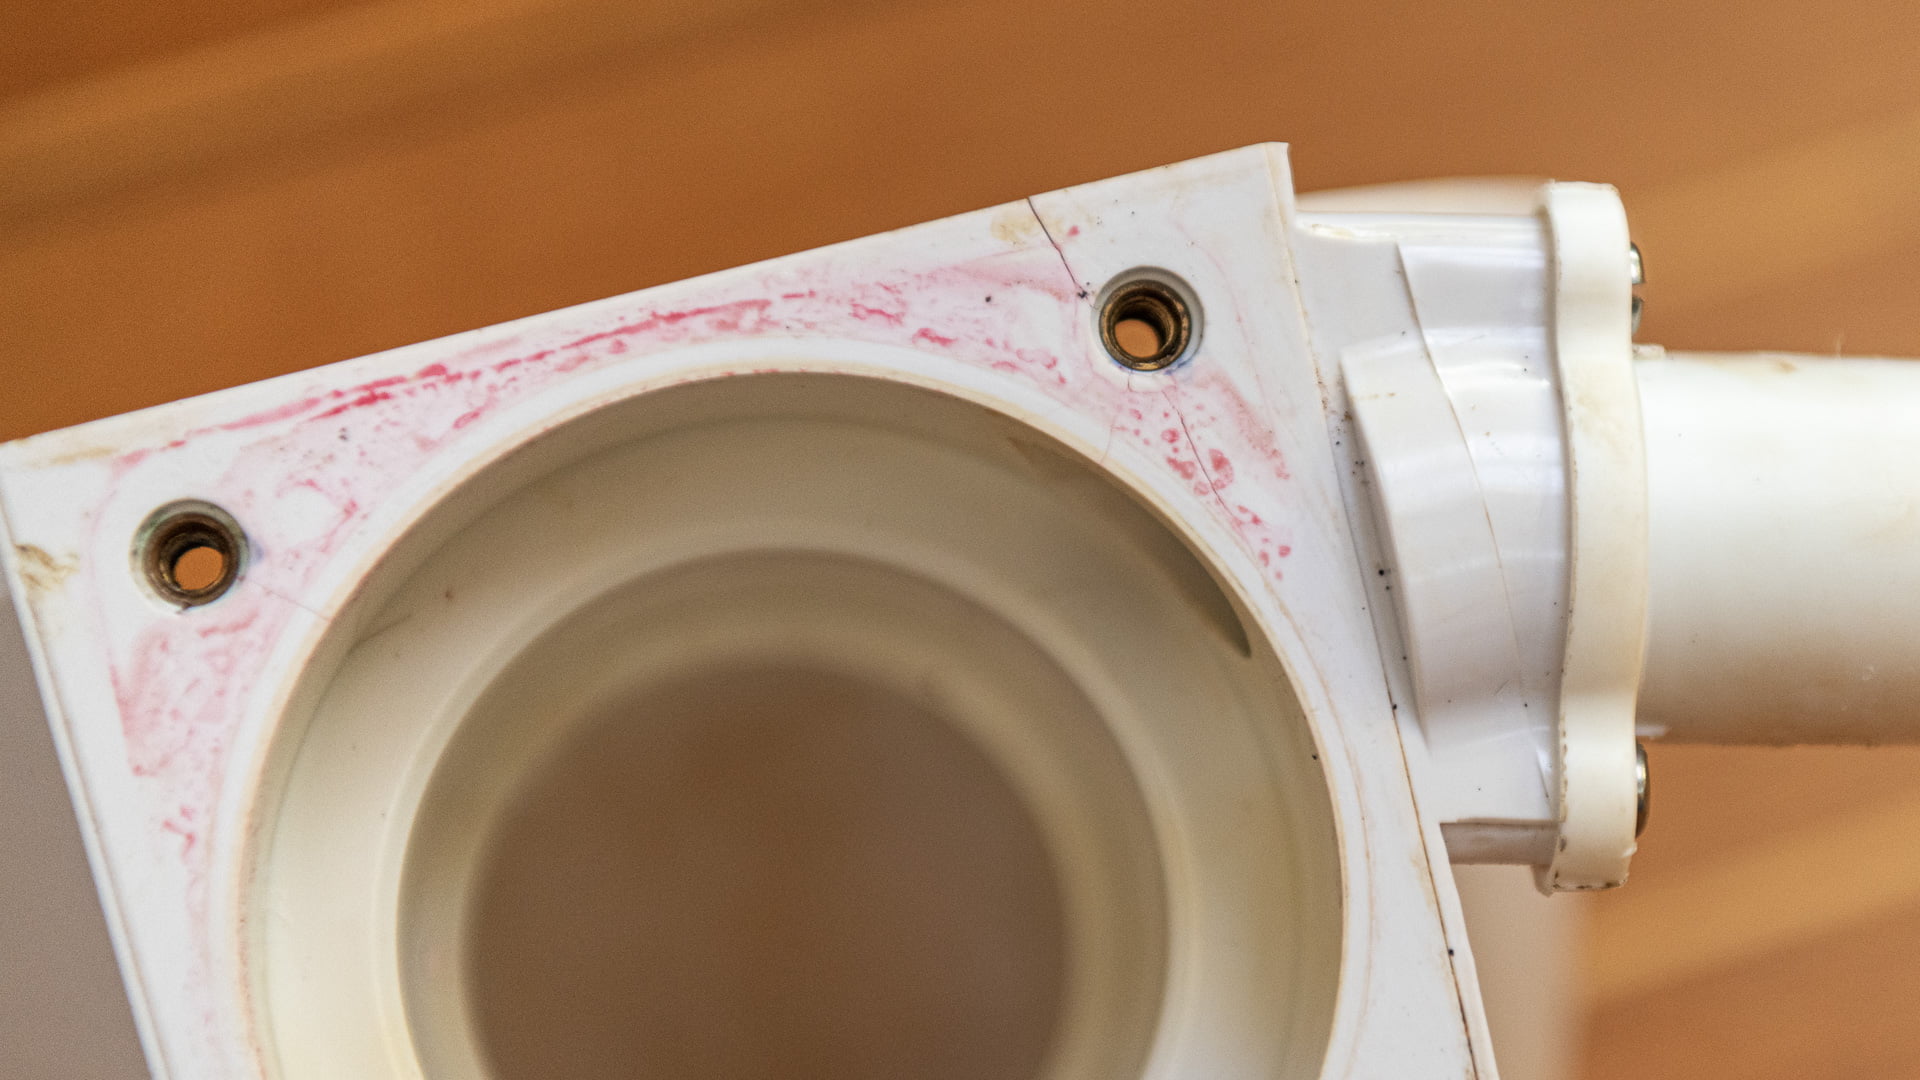 |
|
|
|
Post by loredo on Dec 9, 2022 8:58:02 GMT
Glad you got it sorted out! Well, kinda, almost, now you need to get parts...
When I replaced my base (same haircrack) it was on backorder. Just one last thing to mention, do NOT overtighten the base holding screws, otherwise you're in for yet another adventure. Don't ask how I know!  |
|
|
|
Post by NZL50505 on Dec 16, 2022 21:18:33 GMT
I removed my toilet to replace motor.
|
|
|
|
Post by Zanshin on Dec 17, 2022 12:30:51 GMT
It turns out that the hose in the aft toilet had, in its 11-year life, collected a lot of limescale. The picture below shows the collected scale from about 1-2 feet of cleaned hose, loosened by a 24-hour vinegar soak. As soon as I saw the scale of the scale (pun intended) I went to the chandlery and got a new 10-foot section and ended up spending about 5 hours yesterday pulling out the old sanitation hose and putting in the new. The space is tight and that reinforced hose resists bending. 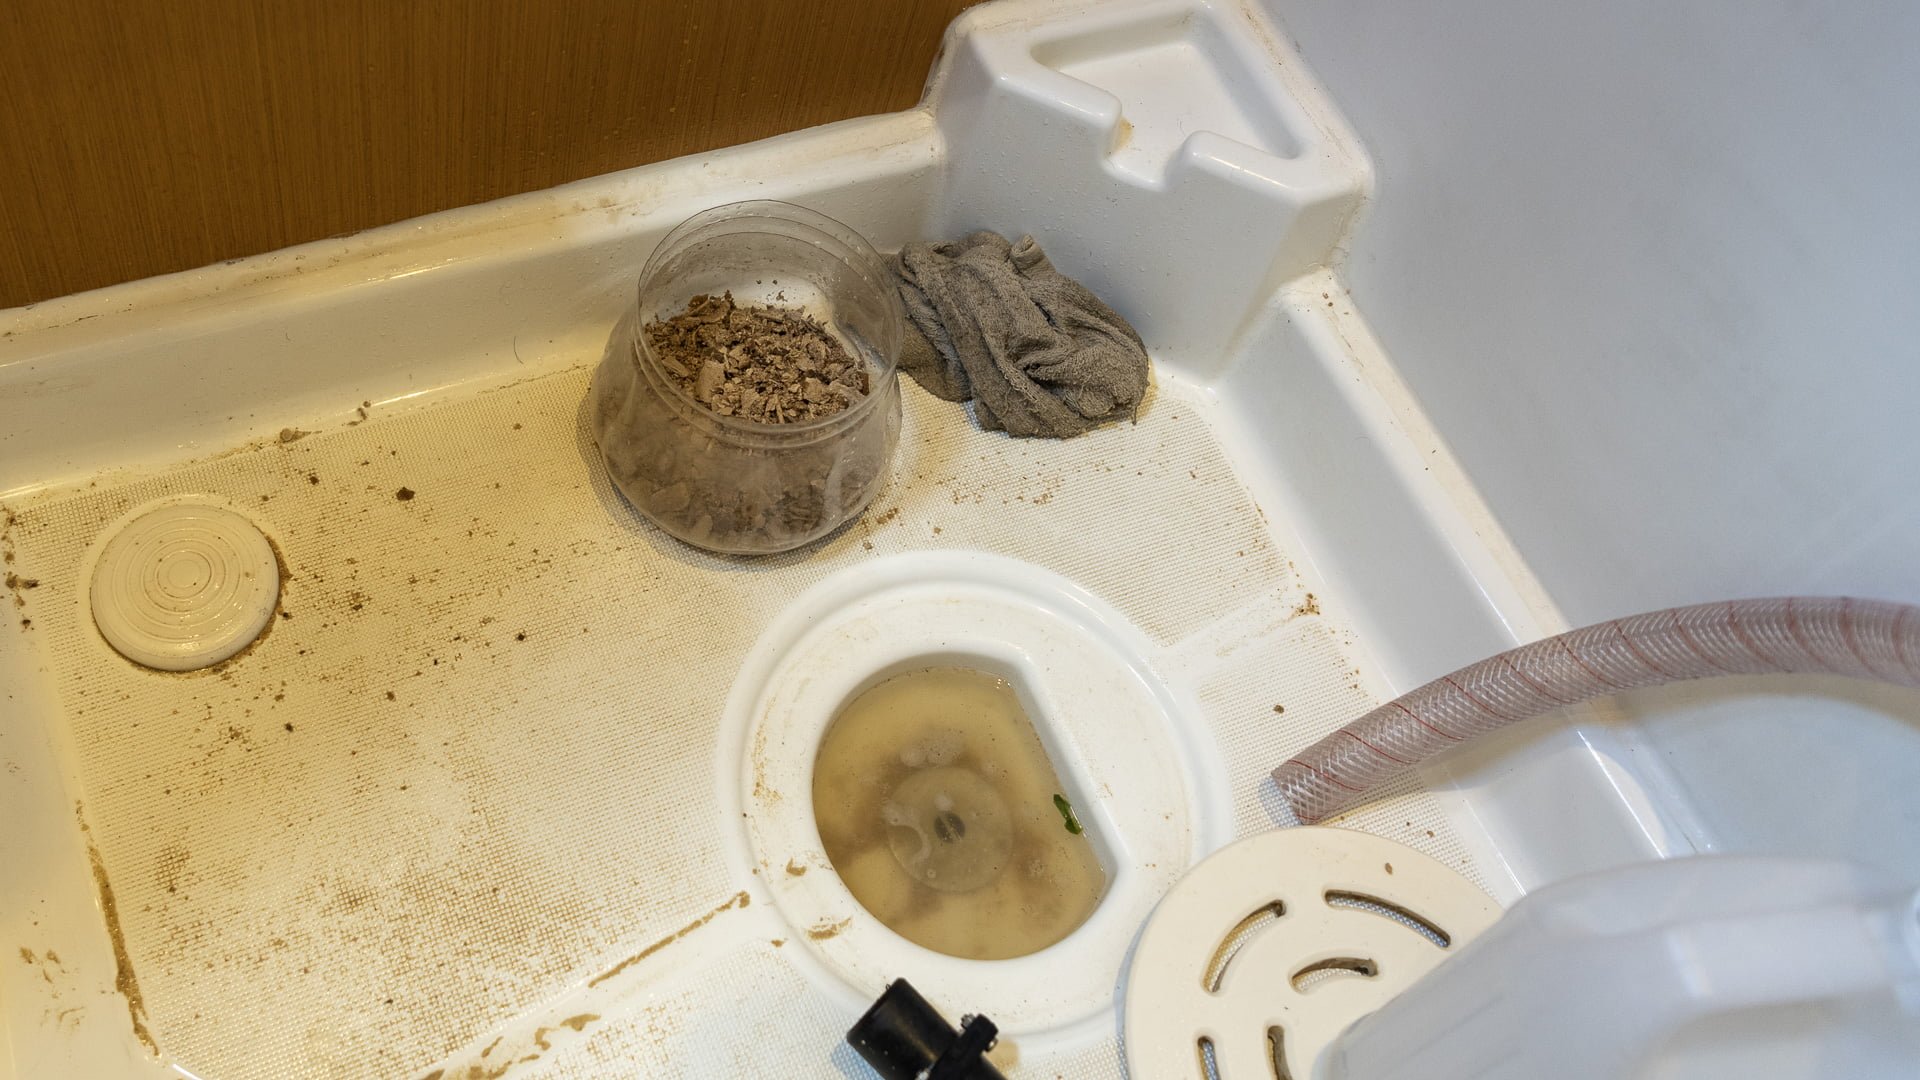 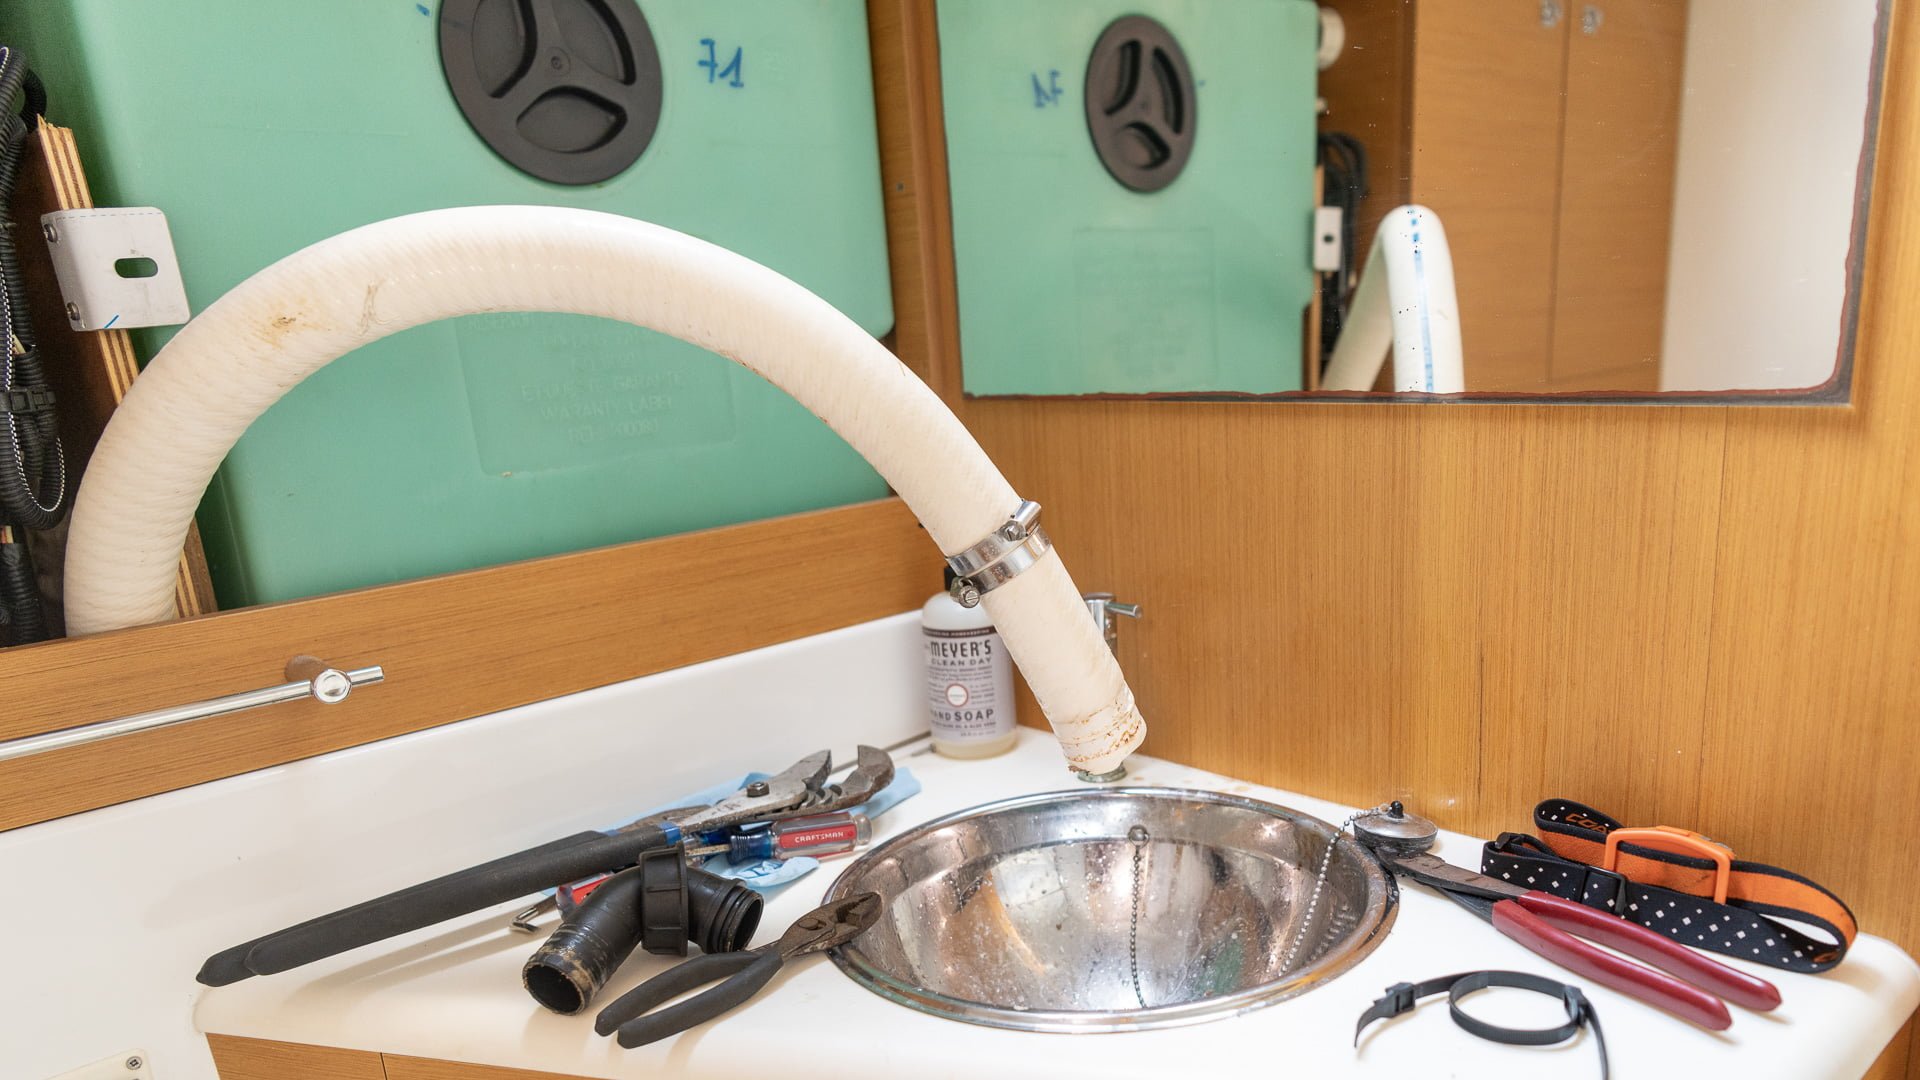 |
|
|
|
Post by bereboot on Dec 18, 2022 8:22:06 GMT
You have to be couragous to change these pipes. Beter put in some vinegar each week.
|
|
|
|
Post by thetoilethelper on Mar 13, 2023 9:13:12 GMT
loredo - I took your advice to heart and bit the bullet, unscrewing the 3 bolts in the base. After trying my hand with the endoscope again and this time I did see some wood. |
|
|
|
Post by thetoilethelper on Mar 13, 2023 9:18:04 GMT
I've worked on the exact same model many times and can tell you that on mine the bolts that hold the unit to the floor are not captive.On the SO2DS you can get to the nuts (and washers) under the floor fairly easily via the access hatch to the sea cock just try not to drop them. I've had to have a few failures seating the seat the O-ring for the motor mount and, as you say, it is a real pain having to do it all over again but nil desperandum you will get there in the end Amazing information. I really enjoy reading this thread and discussion by the people. As someone who is involved in plumbing for many years, I would like to refer The Toilet Helper. Its not only focused on discussing the topic inside out but also our website offer expert tips. Hope everybody enjoys reading this blog. |
|


 Take off the white plastic cover thinghy from the bolts.
 ) but if they did really used bolts & nuts to hold your toilet in place then that would be weird beyond any nightmare! Or in other words NUTS!

